Showing posts with label Recipes. Show all posts

3.31.2012

Turkey Burgers on a Saturday


A Recipe post is long overdue here on the blog...
Just tried out this recipe yesterday and froze a few in preparation for the summer grilling season. They are delicious, and a healthier option when compared to most other burgers. At first I was hesitant to try making these...but I had substituted ground turkey in spaghetti and meatballs quite awhile ago, and both my husband and I loved them. Give it a try and you might be surprised how good they truly are.

Homemade Turkey Burgers
Ingredients: 

  • 3 pounds ground turkey
  • 1/4 cup seasoned bread crumbs
  • 1/4 cup finely diced onion
  • 2 egg whites, lightly beaten
  • 1/4 cup chopped fresh parsley
  • 1 clove garlic, peeled and minced
  • 1 teaspoon salt
  • 1/4 teaspoon ground black pepper

Directions

  1. In a large bowl, mix ground turkey, seasoned bread crumbs, onion, egg whites, parsley, garlic, salt, and pepper. Form into 12 patties.
  2. Grill the patties until the internal temperature is 180 degrees, or do like I did and just cut one in half to make sure it's cooked all the way through.
  3. OR you could cook the patties in a skillet over medium heat.


P.S. The recipe cards shown above are now up at the shop :)

11.25.2011

Hello Salted Caramel Cheesecake!

I am thankful for so many blessings this year...

my wonderful sweet husband
being able to spend Thanksgiving at our apartment with Ben's mom and sister.
being able to take a walk before dinner (this weather is lovely!)
our bright colorful Christmas lights decorating our patio
surviving Black Friday shopping
getting a full 8 hours of sleep after shopping
my hot cup of coffee
my warm cozy apartment

and...I am thankful that I send the rest of our Thanksgiving dessert with Ben to work. 
Why you ask? 
Because it was way too delicious. ( I'm not just saying that because I made it)

SALTED CARAMEL CHEESECAKE

The recipe was originally found on Joy the Baker. The original recipe is to be made in a pie pan. I however, wanted to use my spring form pan so I tweaked the recipe a bit. I listed below the ingredient changes I made for the larger spring form pan size. (I think mine is a 9" pan) The directions on Joy the Baker are very detailed and include pictures so I won't do that here. Follow the same steps, just use the different measurements here.

CRUST INGREDIENTS 
2 1/2 cups ginger snap cookie crumbs
2 tablespoons brown sugar
pinch of salt
3/4 stick unsalted melted butter

CHEESECAKE INGREDIENTS
20 oz cream cheese (at room temp) 
1 2/3 cups granulated sugar
1/2 tsp. salt 
2 1/2 tsp. vanilla extract
2 large eggs (at room temp)
3/4 cup heavy cream
1 tsp. lemon zest (I'd say optional...but it truly adds a lot)

CARAMEL INGREDIENTS
1/2 cup granulated sugar
2 tablespoons water
2 tablespoons light corn syrup
1/3 cup heavy cream
2 tablespoons unsalted butter
1/2 teaspoon sea salt
It's seriously delicious. That's why it had to leave our apartment. A whole cheesecake sitting in our fridge is dangerous. 

10.25.2011

Pumpkin Molasses Cookies


These cookies are a perfect addition to coffee. I like normal molasses cookies just fine, but when you add the slight pumpkin flavor to them something wonderful happens. The pumpkin is not overpowering at all, for those that claim to dislike pumpkin it may be hard to even pick up on it without knowing. What I like best about adding the pumpkin is that it makes for very moist and fluffy cookies. Perfect for breakfast, after dinner, before bed...etc.
makes 2 dozen cookies
Ingredients
2 1/3 cups flour
2 tsp baking soda
1/2 tsp salt
1 tablespoon pumpkin pie spice
1/4 tsp black pepper
8 Tbs butter, room temperature
1 cup brown sugar, packed
1/4 cup molasses
2/3 cup pumpkin puree
1 large egg
1/2 cup sugar, for rolling
Directions
1. Whisk together the flour, baking soda, salt, pumpkin pie spice, and pepper.
2. In your mixer, beat the butter on medium speed until creamy. Next, add the brown sugar, molasses, and pumpkin puree and beat for about 2 minutes, scraping down the sides of the bowl as needed. Add the egg and beat for 1 minute more. Reduce the mixer speed to low and add the dry ingredients, mixing until the flour and spices disappear. If flour remains in the bottom of the bowl, mix the last of the dry ingredients by hand to avoid over beating. You will have a very soft dough.
3. Take your dough and divide it into two pieces and place each piece in plastic wrap. Now place these in the fridge for about an hour, or the freezer for 30 minutes. This will allow the dough to be much easier to handle.
4. Preheat oven to 350 degrees F. Line 2 baking sheets with parchment paper or use a silicone baking sheet.
5. Put the sugar in a small bowl. Working with one packet of dough at a time, divide it into 12 pieces, and roll each piece into a ball. Don't work with the dough too much to get it into balls because it will only get harder to roll. Make a quick ball and roll it in sugar.Roll the balls in the sugar and use a the bottom of a glass to press down on the cookies until they are between 1/4 and 1/2 inch thick. 
6. Bake the cookies one sheet at a time for 12-14 minutes, or until the top feels set to the touch. Allow cookies to cool on the baking sheet for about 5 minutes before transferring them to a cooling rack.
This recipe was found at My Baking Addiction.

10.11.2011

Earl Grey Ice Cream


A few weekends ago my sister and I made some homemade Earl Grey Ice Cream. I was a little hesitant at first because I do not drink much Earl Grey tea, but I am always up for trying a new recipe.

VERDICT: It was very good, but here is the thing...if you don't live the flavor of the tea you probably will not enjoy the ice cream...it is very strong tasting. I loved the small scoop I had, but I would have a hard time eating a whole bowl of it (which is probably a good thing). The flavors are very strong, and I might try steeping the tea  for a smaller amount of time on my next attempt. We had a few people sample it who regularly enjoy Earl Grey, and they loved it...so it is probably a personal preference.

We got the recipe from Gimme Some Oven...so head over there to check it out.


9.08.2011

Raspberry-Oat Muffins

Raspberry-Oat Muffins
I made this muffins a few weeks ago after finding the recipe in a cookbook from the library. They are very filling and delicious. They are also somewhat healthy because they do not contain any butter, and have some delicious grains in them (oats, and bran too if you wish). I have included the original recipe from Pretty Delicious by Candice Kumai. I then included the substitutions I have made below the recipe. 
Ingredients:

1 1/2 cups all-purpose flour
1 cup quick oats (I used old-fashioned ones before though too)
3/4 cup light brown sugar
2 teaspoons ground cinnamon
1 teaspoon baking powder
1/2 teaspoon baking soda
pinch of sea salt
2 large eggs
3/4 cup unsweetened applesauce
2 tablespoons honey
1 cup raspberries (frozen or fresh)
Confectioner's sugar for topping


Directions:
Preheat oven to 400 degrees.

Mix the flour, oats, brown sugar, cinnamon, baking powder, baking soda, and salt together in a large bowl.

Mix the eggs, applesauce, and honey together in another bowl, and then stir this mixture into the flour mixture until completely mixed. 

Finally, fold in the raspberries.

Fill a 12 cup muffin tin with liners if you wish, and then fill each cup 3/4 full. Bake until golden brown on top, and a toothpick will come out clean when inserted in the center. (about 20 minutes)


Let cool and then dust with confectioner's sugar before serving. 

Enjoy!

**substitutions I have made**

*If you prefer you can use non-fat greek yogurt instead of apple sauce.

*I have also added a cup of bran flour too, if  you do this make sure you add 1/4 cup of the applesauce or yogurt.

*I also added sliced almonds as well. You could add any type of nut, walnuts would be good too...


8.31.2011

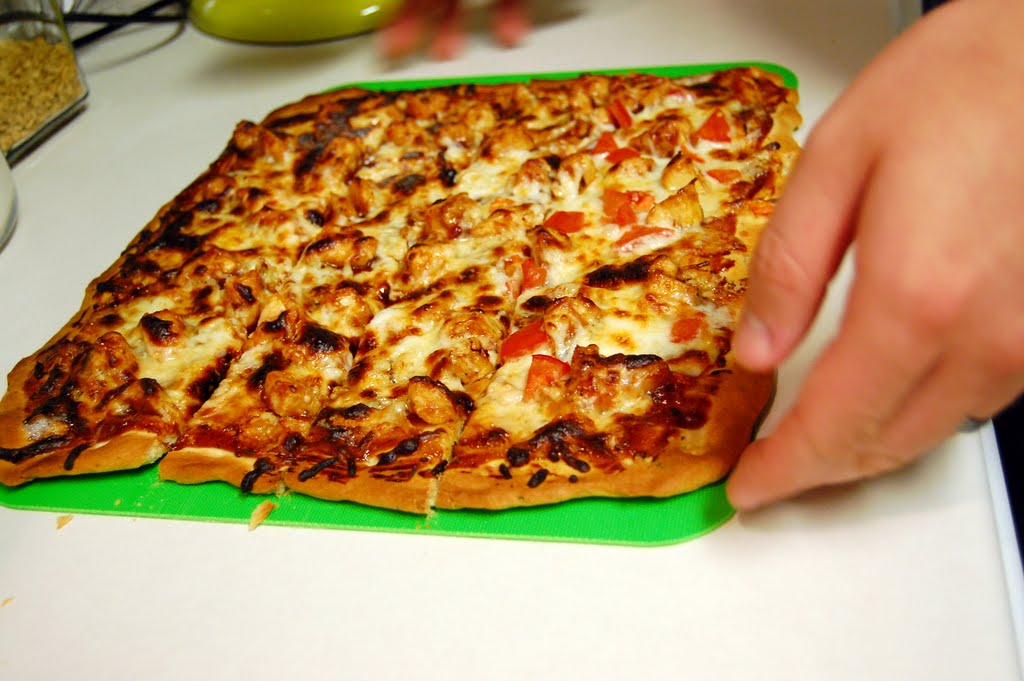
Homemade Pizza Dough & BBQ Chicken Recipe

This recipe is one that is made often in our cozy apartment. I feel confident in saying that this simple meal is one of Ben's top five things to make/eat. I have split up the recipe into two parts. First, you will find the recipe for pizza dough. 
GUILTY: We have used the little packets you mix up for dough and have purchased pre-made dough on occasion...but trust me, the homemade stuff is worth the extra effort. The ingredients are all things you probably have around the kitchen. 
A warning for you, make sure you allow time for it to rise (it takes over an hour). This requires a little planning ahead for dinner time...but it truly is simple to make. 
The second part of the recipe is where the bbq chicken part comes into the picture. If you are feeling daring and want to step out of the realm of boring ol' pepperoni, do yourself a favor and try it out.


Ingredients 

1 1/4 cup warm water
1 package active dry yeast
1 tbls. sugar
1 tsp italian seasoning
3 tbls olive oil
3 cups all-purpose flour
1 tsp salt

Directions:
Mix water, yeast sugar, and olive oil in mixer bowl. (use dough attachment) If you don't have a mixer you can always knead it by hand, it will just take a little more work.


Add flour and salt and Italian seasoning.


Mix for 10-12 min, while sprinkling with flour to keep from sticking to sides of bowl

Dough should be elastic and smooth


Place in oiled bowl, brush dough with oil and let stand 1 hour covered at room temperature

Before rising...
after.
Divide into 2 equal balls and cover with damp towel for 10 minutes

Use the dough right away. This recipe makes enough for two large pizzas. After you press your dough into on the pans make sure you poke a few holes in the dough with a fork to let air escape while baking.


Bake at 375 degrees for 20-25 min

If you want crispier crust we often bake our crust for 10 minutes before adding the toppings...

If you want to make our "specialty" pizza, aka BBQ Chicken Pizza...follow the directions below:

Top pizza crust with bbq sauce and pieces of cooked chicken breast. 

Sprinkle with bleu cheese crumbles and shredded mozzarella cheese.


...and bake as stated above.


Simple enough? I think so. 

8.23.2011

Banana Ice Cream


I've seen this recipe (if you can even call it that) all over the internet lately and I decided to try it out since I have a few bananas that need to be used up.


I used 3 very ripe bananas.  Peel and slice each banana into about 3/4in pieces (it doesn't matter too much what size they are) Then, place them in a bag and put them in the freezer until completely frozen (this will take a few hours so plan ahead!). Now when you are ready to make the ice cream put the chunks of frozen banana in a food processor and process until nice and creamy.  If you like bananas quite a bit you can eat it just how it is, but you can also add other ingredients to spice things up. For instance, I added a big spoonful of peanut butter and a little bit of honey while processing the bananas. If you need a little chocolate fix you could even mix in some chocolate chips. Feel free to experiment with it!

The key to this ice cream is that it must be served immediately after processing it.  If you re-freeze it, it just does not have the same creamy texture.  


This is just what I need on a hot summer day.


Happy Tuesday to you!

8.18.2011

Rhubarb perfection.

I have always loved Rhubarb. 

I always have a hard time finding any of it to bake with, so when I saw some at the Farmers' Market last weekend I snatched it up. I had it sitting around in my fridge for a few days while I searched for the perfect recipe. 
I found it.
This cake was absolutely amazing. Even before baking it I knew it had promise because the batter smelled wonderful. Bekah and Ellie came over to help me make it and eat it. ( I always try to bake when I know that someone besides Ben and I will be consuming it) 

Anyway, it was late into the evening before it came out of the oven so I didn't get a decent photo of it then, but here is someone else's photo of the same recipe.


SOUR CREAM & RHUBARB CAKE
(recipe from “The Country Cookbook” by Belinda Jeffery)


Ingredients:

2 & 1/3 cups Self-Raising Flour

1/2 tsp salt
2 tsp cinnamon
4 Tbsp unsalted butter, at room temperature
 & 1/2 cups firmly packed brown sugar
1 large egg
3 tsp pure vanilla extract
1 cup sour cream
4 cups rhubarb, cut into 1cm chunks
1/4 tsp grated nutmeg
1/2 cup white sugar
vanilla ice cream, to serve with (if you wish)


Directions:
1. Preheat your oven to 350 degrees and grease a round cake pan (I used my a 9" spring form pan but you don't have to). You could honestly use any pan that will hold the batter. Then mix together the flour, salt, nutmeg and 1 and 1/2 tsp of cinnamon in a bowl with a whisk and set aside. Put the butter and brown sugar into a separate bowl and beat till the mixture resembles (and feels like) wet sand.
3. Once the butter is fully incorporated, add the egg and beat will till the mixture is fluffy and creamy and there are no more lumps of sugar.
4. Add the sour cream and vanilla and beat in till well combined.
5. Mix in the flour on low speed till combined, then add your rhubarb chunks and stir briskly to make sure that the rhubarb is completely coated in batter. 
6. Once the mixture is combined, scrape it into your prepared cake tin and sprinkle the top liberally with sugar and the remaining cinnamon. 
7. Bake the cake for 1 hour, or till a wooden skewer inserted into the middle of the cake comes out clean. 

I would recommend serving this warm with a dollop of vanilla bean ice cream…but it also just as good when it cools down. I had a piece for breakfast with my coffee the next morning. (what?! there is fruit it in!) haha.


7.16.2011

Baseball and Chocolate Baking

We started the weekend early by going to a Redhawks game on Thursday night. The weather was questionable for most of the day, but thankfully the rain never came. It cooled down nicely too...so much so that I enjoyed a nice hot chocolate during the game. Hot Cocoa in July?! Why not?

Oh and don't worry we also ate some hot dogs and mini-doughnuts. I couldn't remember when the last time was that I had mini-doughnuts. Needless to say it will probably be awhile before I give in to having that form of greasy goodness again. 


Oh and I also made these delicious cookies as well...
They look similar to chocolate crackle cookies, but these are made without flour so they are a much denser and fudge like cookie. 


Deep Dark Chocolate Cookies
Found at Divine Baking

Ingredients:


Nonstick vegetable oil spray
1 1/2 cups bittersweet chocolate chips
3 large egg whites, room temperature
2 1/2 cups powdered sugar, divided
1/2 cup unsweetened cocoa powder
1 tablespoon cornstarch
1/4 teaspoon salt


Directions:
Preheat oven to 350°F. Spray 2 large baking sheets with nonstick spray. Melt 1 cup chocolate chips (save the other 1/2 cup for later)  in glass bowl in microwave, stirring twice, about 2 minutes. Cool slightly.
Using electric mixer, beat whites in large bowl to soft peaks. Gradually beat in 1 cup sugar. Continue beating until mixture resembles soft marshmallow creme.

Whisk 1 cup sugar, cocoa, cornstarch, and salt in medium bowl to blend. On low speed, beat dry ingredients into meringue. 


Stir in lukewarm chocolate and 1/2 cup chocolate chips (dough will become very stiff).
Place 1/2 cup sugar in bowl. Roll 1 rounded tablespoon dough into ball; roll in sugar, coating thickly. Place on prepared sheet. Repeat with remaining dough, spacing 2 inches apart.


Bake until puffed and tops crack, about 10 minutes. Cool on sheets on rack 10 minutes. Transfer to rack; cool.

**If dough is difficult to roll into balls, put it in the refrigerator for a few minutes.

Yield: Makes about 18


Enjoy!


5.21.2011

Dark Chocolate Grahams


DARK CHOCOLATE GRAHAMS
yum.

What you need:


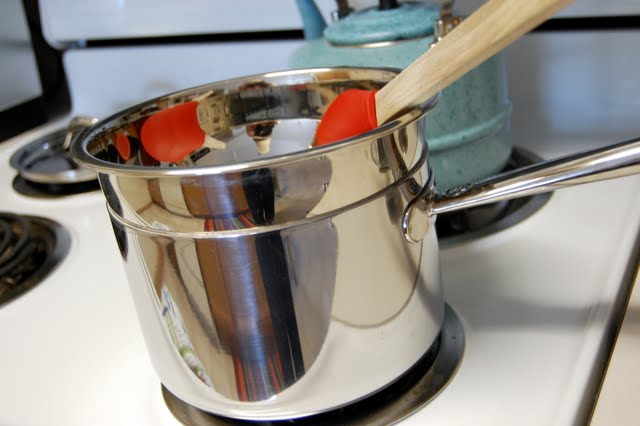
**I kind of made my own double boiler by putting a couple of inches of water in the lower pan and then placing a bowl on top. This way the chocolate doesn't burn. If you don't have anything that works like this you can always just melt the chocolate in the saucepan, but don't leave it on the heat while you dip...it may burn.


Now watch the magic happen...


Note: I used a silicone mat, but you could use wax paper underneath. When the sheet is full place it in the freezer for about 5 minutes.


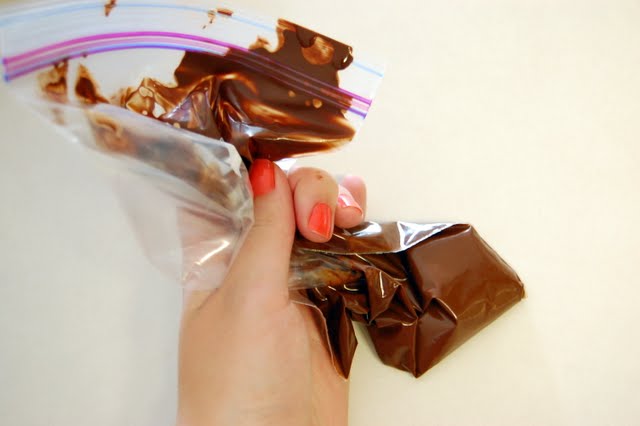
This added drizzle isn't necessary, but I wanted to give the tops a little more texture. Make sure you chill them before you do the drizzle, otherwise it will just melt flat. 

Place back in the fridge or freezer for about 30 minutes. They will be easy to handle then for storage or wrapping up. I keep them in the fridge either way because our apartment gets pretty warm.


3.21.2011

Sour Cream Blueberry Muffins


Blueberry Muffins

Ingredients

1/2 cup butter
1 1/2 cup sugar
1/2 tsp. salt
4 eggs
1 1/2 cups sour cream
1 tsp. baking soda
1 tsp baking powder
2 3/4 cup Flour
1 package of fresh blueberries (about 1 1/2 cups)

Cream together butter and sugar in mixer. Add in eggs and sour cream. Mix salt, baking soda, baking powder,and flour in separate bowl. Gradually add in dry ingredients into mixer until combined. Gently fold in 3/4 of blueberries and then save the rest to sprinkle on the top once you pour batter into muffin tins. (use muffin liners or grease the pan before!)
Sprinkle extra blueberries on top and dust with cinnamon and sugar too if you wish.

Bake 15-20 minutes at 375 degrees.

Recipe from my lovely friend and sister of my sister-in-law if that makes sense, haha. I stole this recipe from her a couple years ago when we were roommates so hopefully she won't mind me sharing it with you :)

2.27.2011

Chocolate Whoopie Pies


At my sister's bridal shower a few weeks ago I made some Chocolate Whoopie Pies. This is considered the classic whoopie pie flavor...They have a delicious rich chocolate cake with a marshmallow flavored frosting middle. How can you go wrong with chocolate and marshmallow? They do get a little messy to make with the frosting, but if you give yourself adequate time (not rushing around piping frosting 10 minutes before guests arrive) you should have a beautiful finished product. 


Chocolate Whoopie Pies
{with Marshmallow Filling}

makes about 24 sandwich cookies


Ingredients:

For the cookies:
3½ cups all-purpose flour
1 tsp. salt
1½ cups unsweetened cocoa powder
1 tbsp. baking soda
1 tsp. baking powder
1 cup (2 sticks) unsalted butter, room temperature
2 cups sugar
2 large eggs
2 cups buttermilk, at room temperature
2 tsp. vanilla extract


For the filling:
1 cup (2 sticks) unsalted butter, at room temperature
2 cups confectioners’ sugar, sifted
7½ oz. marshmallow fluff
2 tsp. vanilla extract


Directions:
Preheat the oven to 400˚ F.  Combine the flour, salt, cocoa powder, baking soda, and baking powder in a medium bowl; whisk together to blend.  Set aside.  Line two baking sheets with silicone baking mats or parchment paper.  In the bowl of an electric mixer fitted with the paddle attachment, combine the butter and sugar.  Beat together on medium-high speed until light and fluffy, 2-3 minutes.  Beat in the eggs one at a time, blending well after each addition.  Blend in the buttermilk and vanilla extract until incorporated.  Mix in the dry ingredients, blending just until combined.


Using a 1-oz dough scoop, drop the batter onto the prepared baking pans, 12 cookies per pan.  Bake for 12 minutes, rotating the pans halfway through baking.  Allow to cool on the pan 5-10 minutes, then transfer to a wire rack to cool completely.  Repeat with the remaining batter.
To make the filling, place the butter in the bowl of a mixer fitted with the paddle attachment.  Beat on medium-high speed until smooth, 1-2 minutes.  Blend in the confectioners’ sugar until incorporated.  Beat in the marshmallow fluff and vanilla until light and fluffy, 2-3 minutes.
Once the cookies are completely cooled, match them up in pairs by size.  Fill a pastry bag fitted with a plain with the marshmallow filling.  Pipe a dollop of marshmallow filling onto the flat side of one cookie of each pair, and sandwich the cookies together, pushing the filling to the edges.  Store in an airtight container.
Source: Martha Stewart
Enjoy! 

LinkWithin

Related Posts Plugin for WordPress, Blogger...