Okay so awhile ago I made a few pot holders for myself and as a house warming gift for a friend. I was never satisfied will all the boring pot holders I see in stores. I took a few photos along the way so you can treat this as kind of a weak lazy tutorial on my part. I won't give you exact measurements or steps but I think if you have some sewing experience you will be able to look at the pictures and figure out the rest. So sorry for my lack of trying I just didn't really think to measure everything while I did it.
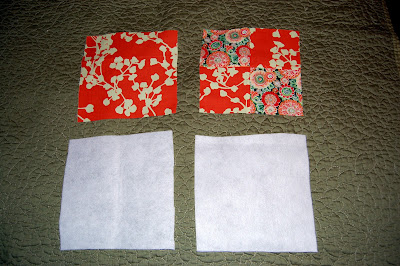
two pieces of fabric 8" X 8"
two pieces of fusible batting 8" x 8"
I chose to quilt one of my pieces of fabric for the front of the potholder so I created a quilt square out of four squares to get a eight by eight piece. You could just do one piece of solid fabric or quilt it however you like.
Iron on the batting to the backside of each fabric piece.
to get the "quilted" look I did some decorative stitching to the front piece of my fabric once the batting was ironed on (see the zig zag stitch below)
For a tab on the pot holder I cut a strip of coordinating fabric of about 7" X 2.5"
I pressed this piece so that when folded the edges were tucked in (see below sequence)
then I stitched it closed on one side.
fold this tab in half and then pin it between the two "good" sides of the front and back of your pot holder. This way when you flip the pot holder from inside out the tab will be on the outside.
pin the rest of it to keep from shifting
sew around the entire square leaving about a 3 inch opening to turn the piece right side out. The two vertical pins above show the opening I left. So I started at the outside of the one pin and continues all around the square stopping at the 2nd pin.
Then Flip it!
You will then have something that looks like this
I then sewed about a 1/4 inch around the edge to further finish and secure the pot holder. I also closed the opening that I left by doing this, just make sure that the fabric is folded over so that it closes it as you stitch along that side. You could hand stitch is closed as well.
Ta-da!


such a great house warming gift :)
ReplyDeleteSo cute! If I ever learn how to sew I am going to do this! I have a sewing machine... so someday I will learn!
ReplyDeleteI love how these turned out- the fabric is perfect!
ReplyDeletethese are so dang cute! love the fabric you chose as well!
ReplyDeletexo
Loving your fabric choices. Just stumbled by your blog - SO stinkin' cute!
ReplyDelete